Today we wanted to talk to you about removable wallpaper installation. Self adhesive removable wallpaper installation to be more accurate. If you have recently purchased your first self adhesive wallpaper or are planning to do a DIY wallpaper project and looking for tips on how to do everything correctly, this wallpaper installation guide will be very useful for you! Now, let's begin!

Is peel and stick the removable wallpaper? And what is the best removable wallpaper?
It's common misconception that 'removable wallpaper' stands only for the 'peel and stick' wallpaper type. In a world as fast-evolving as this, most of the traditional wallpapers are now also considered 'removable wallpaper'. Why? Because the traditional wallpaper material (like the one we offer in our range) consists of special non-woven fibers, which doesn't expand or contract and keeps the wallpaper panel as one whole piece. (If you wish to learn more of the differences in our self adhesive and traditional wallpapers, please read the blog post linked here which highlights the most important differences between the two.) The result? When it's time to remove the wallpaper, it comes off in full panels. AND doesn't leave ANY residue behind! That is, if the wall has been prepped correctly before, of course. How is that important, you might wonder? And does it even matter if you're installing 'self adhesive' wallpaper not traditional wallpaper.. Each of these materials have their pros and cons, which you can learn here. But now, let's jump right into self adhesive wallpaper installation!
Peel & stick wallpaper is perfect for a quick and stylish room refresh! Watch our video tutorial to see just how simple it is to apply, remove, and reposition—no mess, no stress, just instant results.
1. Before you begin
The self adhesive wallpaper we offer is textile based material with an adhesive backing. All you need to do is peel the backing paper off and apply it to the wall. It is also PVC-free and Vinyl-free for safe use in kid's rooms and nurseries. Why are we mentioning this? Because unlike most peel and stick wallpapers that are vinyl based, our vinyl-free self adhesive wallpaper will stick and hold on to most surfaces, even lightly textured walls. That is because the adhesive is slightly more effective. This means you will not have to worry about the wallpaper falling off of your wall when the temperature in your home changes. It will also not shrink revealing seams, like most vinyl wallpapers do. However correct wall preparation for beautiful and long-lasting results is always important. Let's look into this more deeply.
2. Wall preparation & common questions
Will the self adhesive wallpaper stick to textured walls?
Most often than not we get asked if the wallpaper will stick to textured walls. The short answer is, it depends. If you are talking about rough orange-peel texture that's bumpy to touch, then I'm afraid no - you will need to sand it down. But if you're referring to slight texture that's almost smooth, then in most cases that will not be a problem for self adhesive wallpaper. And this is exactly why we offer wallpaper samples! You will find self adhesive samples on each listing as '19"x19" Self adhesive wallpaper sample'.
Can I install self adhesive wallpaper on plasterboard or drywalls?
Another question we get asked, is if it will stick to plasterboard walls. It will. But you will not be able to reposition it during installation or get it down when it's time for a change. Therefore, we do not recommend installing self adhesive removable wallpaper on bare drywalls under any circumstances! At least a primer is required for a proper wallpaper installation on plasterboard walls.
Will the self adhesive removable wallpaper take off the paint of my wall when I try to remove it?
One of common questions we've seen lately is - does peel and stick wallpaper ruin walls? It depends. If the wall has been poorly prepped, haven't been treated with a primer before painting and the paint is completely matte, it might leave it spotty. Any removable wallpaper would. Though you have to keep in mind that there are numerous other factors that can affect the final result - for example the quality of the paint that has been used on your walls and the temperature and humidity of your home when the paint was drying afterwards. If however you know your walls are in tip-top condition, you know they have been primed before paint and there is no paint chipping anywhere, you're good to go! Also an optional step for easier wallpaper removal: prime your walls couple of days before installing the wallpaper.
3. First removable wallpaper installation steps
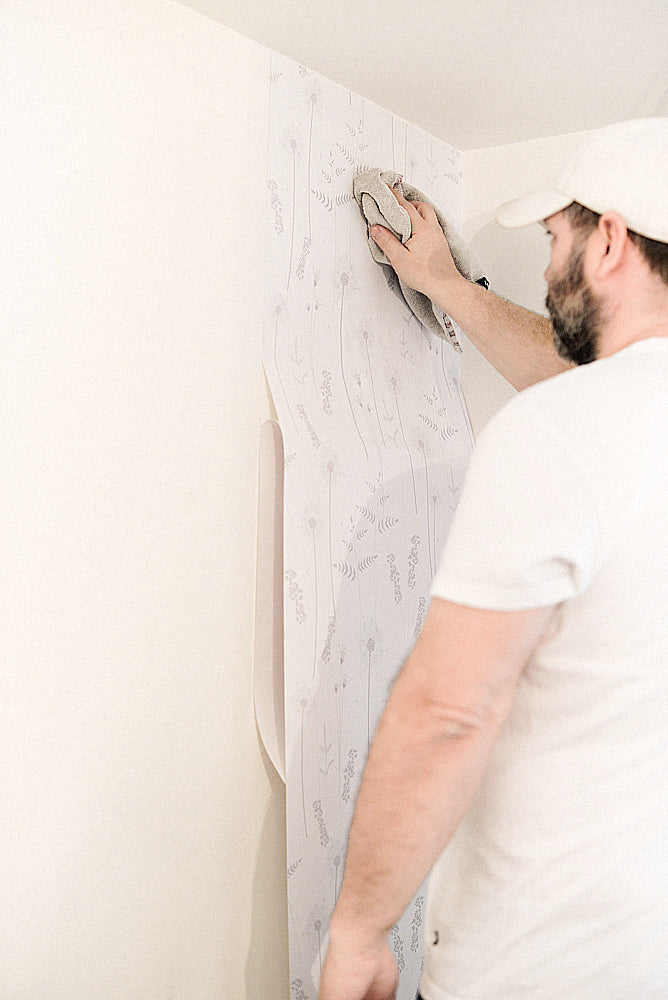
Give your wall a quick wipe down
Dust and adhesive are not good friends. Therefore wipe your wall with a cloth to get rid of any dust that may have settled there. It will only take a couple of minutes and you will ensure the wallpaper adheres properly.
Don't just start installing wallpaper from the top of the wall
We can't stress this enough. It's common way of thinking that ceiling is perfectly even, but in most cases it couldn't be further from the truth. If you will simply start to install wallpaper panels from the top where wall and ceiling meets, it is very likely that as you will match the pattern when installing following panels, the wallpaper will start to go up or down leaving you short on top or bottom. So find a level spot first!
Don't peel off all backing paper at once & leave a little extra material for top and bottom of your wall
Start by peeling off first 10-20 inches only, as it will give you an easier start. If you peel off all the backing paper at once, the wallpaper may stick to itself causing mayhem and you losing your nerves trying to un-stick it. Find your level spot, make sure the wallpaper matches it vertically and start the installation from there. If you've ordered longer wallpaper panels, make sure to leave a little extra material on top of the wall as well to avoid any gaps just in case the ceiling isn't perfectly even. How much material should you leave on top? If your ceiling isn't very uneven, then an inch will do just fine. Check this with a level tool!
4. Finishing removable wallpaper installation steps
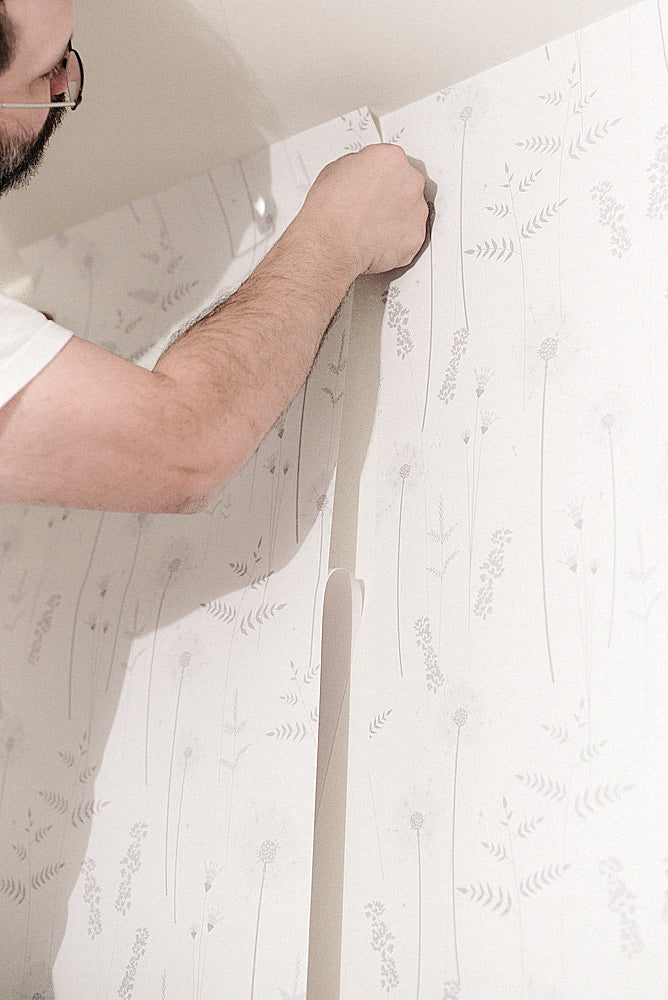
How to match the pattern & smooth out wallpaper
When installing the next panel, make sure to match the pattern for a beautiful finished look. Peel off the same 10-20 inches of the next panel, position it next to the previous one and try to match the pattern as perfectly as possible. We always recommend a helpful hand here for a neat result! Keep in mind you shouldn't stretch the wallpaper too much when installing, as it might result in uneven pattern. To smooth out the panels, use either soft cloth or a flexible squeegee. Avoid any harsh squeegees, etc as they may damage the surface of the wallpaper. If you wish to smooth the wallpaper out with your hands, make sure to wear white cotton gloves. Nail varnish for example can easily smudge the wallpaper, and it will be very hard to get rid of those type of stains.
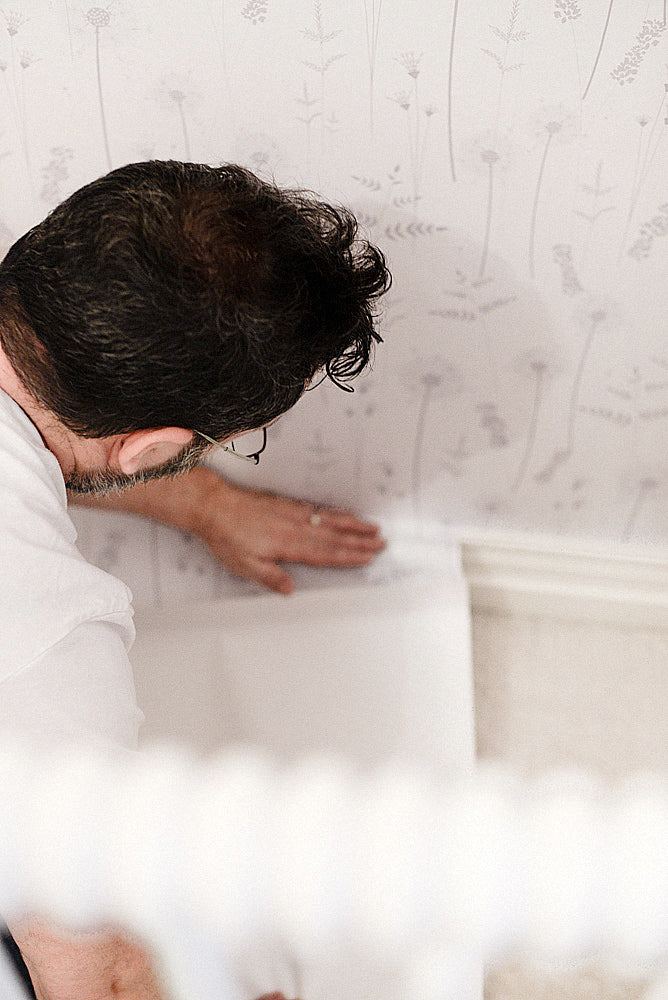
Cut off the excess material with a sharp knife
You can do this after installing each wallpaper panel, or at the end when all the panels have been installed as there is really no right answer here. The most important thing though, is to use a sharp knife for this step. As this is textile based wallpaper, firstly it will be harder to cut it and the wallpaper might tear if you use a blunt knife. Cut out all electrical sockets, light switches, put the covers back on them and voila, you're done! Enjoy your new beautiful accent wall!
You can visit our YouTube channel where we have posted several installation videos for peel and stick as well as traditional wallpaper materials, so you can see the whole installation process in just a couple of minutes!
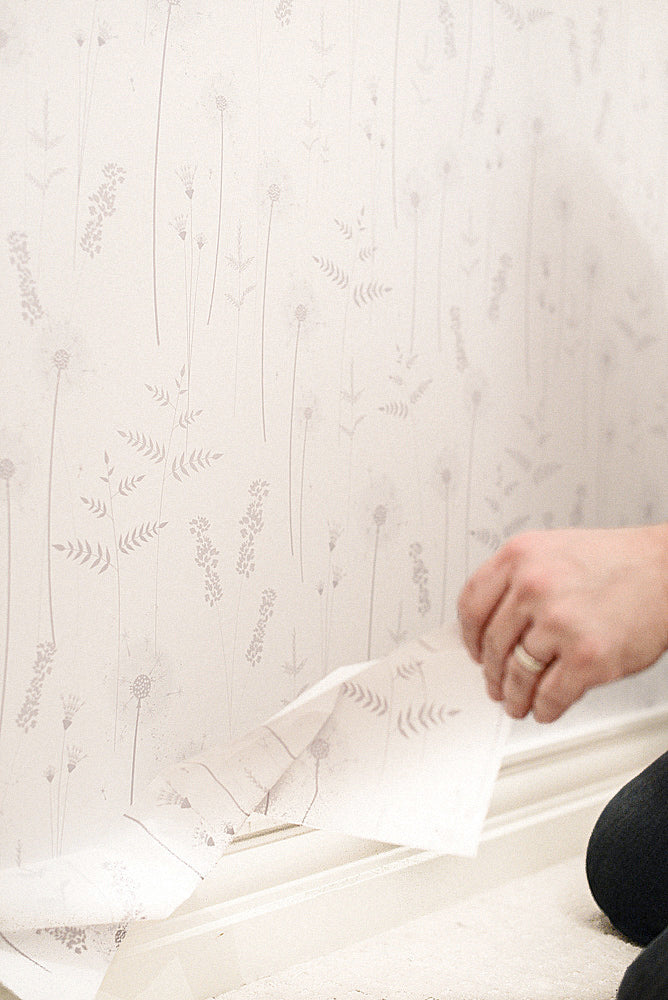
5. How to remove self adhesive removable wallpaper and is removable wallpaper really removable?
Be patient and do it slowly
The most important thing to keep in mind is to be patient. The wallpaper should be peeled off in 90 degree angle, and it must be done very slowly. Why? Because it has been on your wall for a while and has bonded with the paint. If you try to rip it off quickly, it will take the paint with it. As any self adhesive wallpaper or even scotch tape would!
Use a gentle heat for easier removal
Another common question found on the web regarding removable wallpaper - is it easy to removable removable wallpaper? And, it is! But if you feel it has stuck too strongly to the wall, a gentle heat (like from a hairdryer) will help to ease the adhesive of the wallpaper and allow you to remove the wallpaper easily.


Hi, Melissa! Thank you for reaching out!
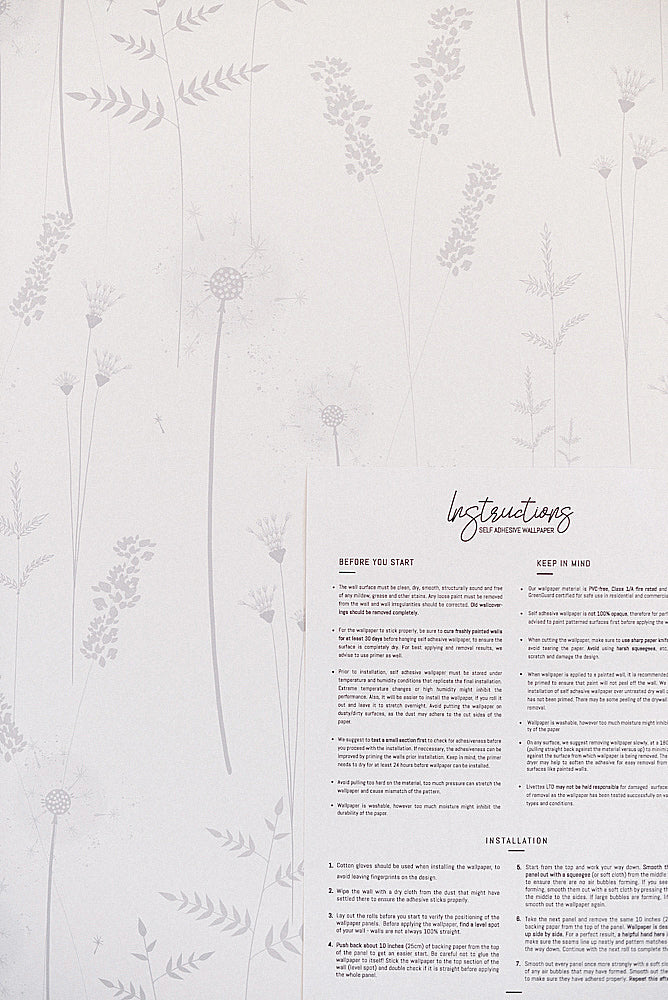
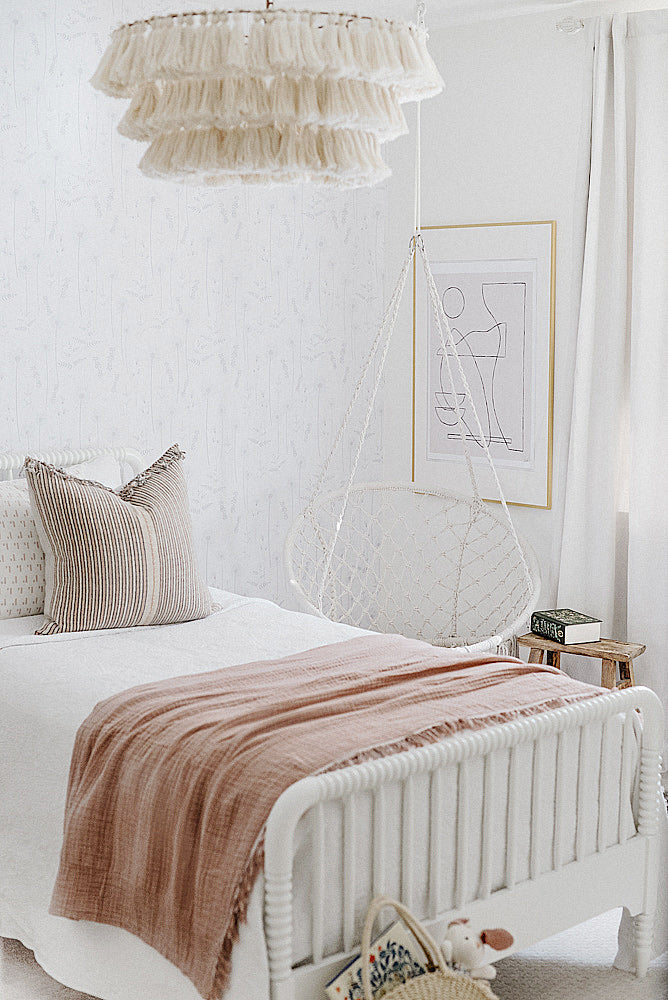
The wallpaper pictured is our “Grey Meadow Wildflowers Nursery Removable Wallpaper” in the original colors: Wall & White. However, you are more than welcome to customize them to your liking.
Please let us know how it goes and if there is anything else we can help with via info@livetteswallpaper.com!
Kindest regards,
Livette’s